Menu
| Processors | > | Bulk Payments |
Mandatory Prerequisites
Prior to running the Bulk Payments Process, refer to the following Topics:
Screenshot and Field Descriptions
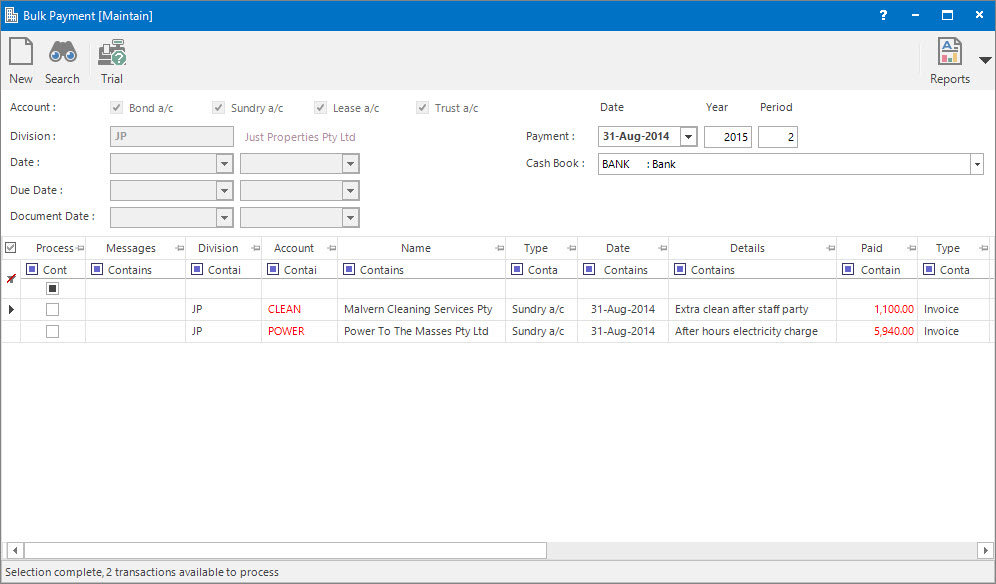
Selection Parameters:
Account: this is a selection filter for the type of a/c.
Division: this is the division to run the process for. It will default to the division that the user is logged onto.
Date: this is a selection filter for the transaction date range to include.
Due Date: this is a selection filter for the due date range to include.
Document Date: this is a selection filter for the document date range to include.
Payment Parameters:
Payment Date: this is the transaction date for the Payment transactions that will be created.
The default values for Payment Date, Year and Period come from the Accounting Period marked as Current.
Payable Transactions table:
This will be populated with the transactions to be paid based on the selection parameters entered when the Application tool-bar push button: Select is clicked. The columns are non-editable with the exception of:
- Process - click the check box to select / deselect transactions to be paid.
- Paid - by default the outstanding amount of the transaction will be shown in this column. This can be changed to a lesser amount if required.
How Do I : Run the Bulk Payment process
If a Bulk Payment report is already held in the system (from a previous run) the Application tool-bar push button: X Report will appear. Click the button to reset the pending report so a new Payments process can be run.
The Bulk Payment report is only temporary. It will be overwritten when the next Payments process is run.
The Bulk Payment Process is associated with the following Topics: